
Turn on suggestions
Auto-suggest helps you quickly narrow down your search results by suggesting possible matches as you type.
Showing results for
Turn on suggestions
Auto-suggest helps you quickly narrow down your search results by suggesting possible matches as you type.
Showing results for
- Community
- Creo+ and Creo Parametric
- System Administration, Installation, and Licensing topics
- Having an issue with inserting decals (grey wash o...
Options
- Subscribe to RSS Feed
- Mark Topic as New
- Mark Topic as Read
- Float this Topic for Current User
- Bookmark
- Subscribe
- Mute
- Printer Friendly Page
Having an issue with inserting decals (grey wash over image)
Jun 08, 2015
06:31 PM
- Mark as New
- Bookmark
- Subscribe
- Mute
- Subscribe to RSS Feed
- Permalink
- Notify Moderator
Jun 08, 2015
06:31 PM
Having an issue with inserting decals (grey wash over image)
Hi,
I would appreciate any help or advice with this problem I am having.
I am using Creo 3 and am having a problem when I try to insert a decal. I map the decal and then select the surface I want it on, the image appears, but with a sort of grey wash over ever decal I insert. Even transparency seems to be affected.
I have tried adding the config.pro option "enable_opengl_shader no" as was suggested in https://community.ptc.com/t5/3D-Part-Assembly-Design/Windchill-upgrade-to-Creo-decal-issue-duller-greyish-colors/td-p/97207#250266 for someone with the same problem in Creo 2, but it doesn't seem to have had any effect. Is there perhaps a different solution for Creo 3?
Thank you.
Labels:
- Labels:
-
General
10 REPLIES 10
Jun 09, 2015
01:09 AM
- Mark as New
- Bookmark
- Subscribe
- Mute
- Subscribe to RSS Feed
- Permalink
- Notify Moderator
Jun 09, 2015
01:09 AM
Oscar,
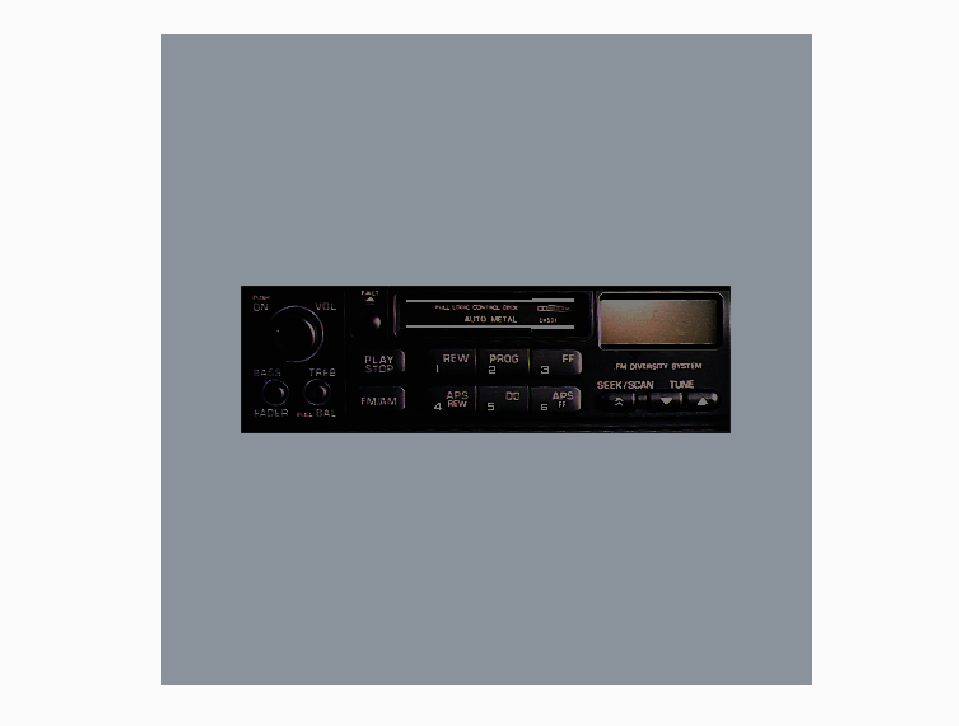
I tested Creo 3.0 M040. I used decal radio.tx4 located in <CR3_M040_LOADPOINT>\Creo 3.0\M040\Common Files\graphic-library\textures\Decals\car-interior directory. Decal was displayed correctly (I hope).
Can you upload your decal file and attach a picture of your model ?
Martin Hanak
Martin Hanák
Jun 09, 2015
07:14 PM
- Mark as New
- Bookmark
- Subscribe
- Mute
- Subscribe to RSS Feed
- Permalink
- Notify Moderator
Jun 09, 2015
07:14 PM
Hi Martin,
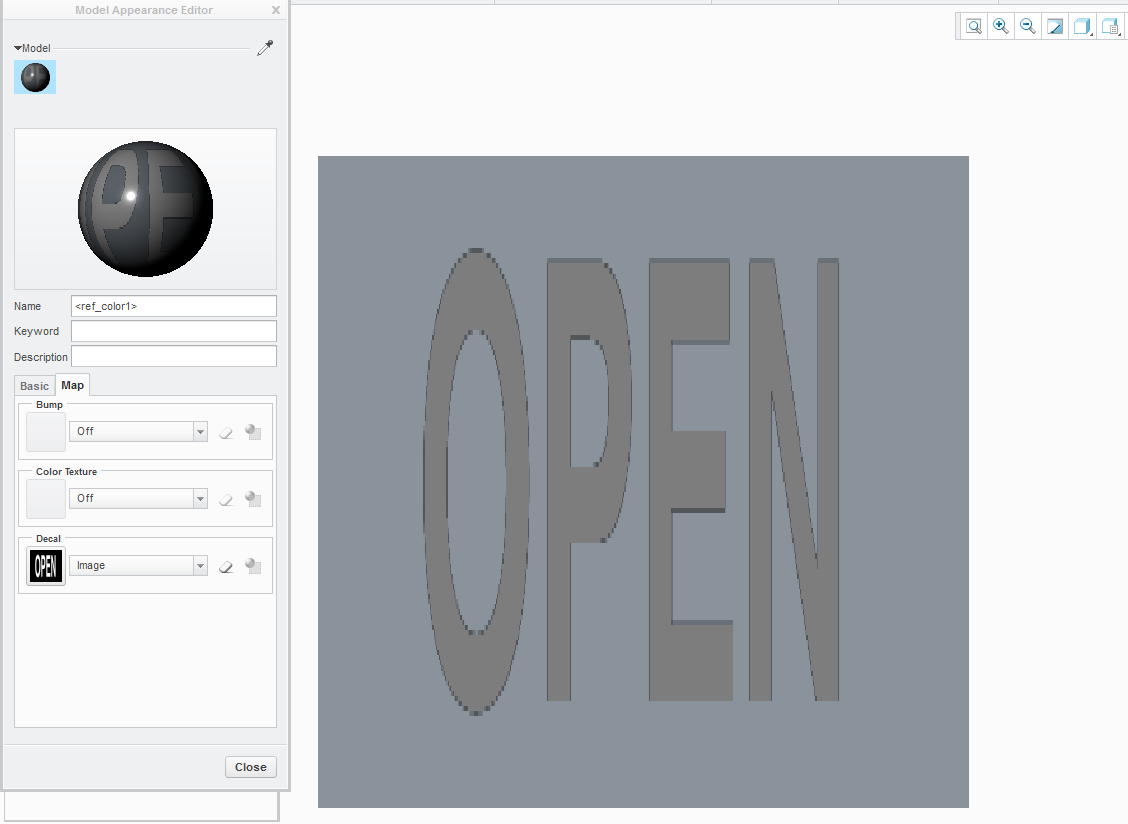
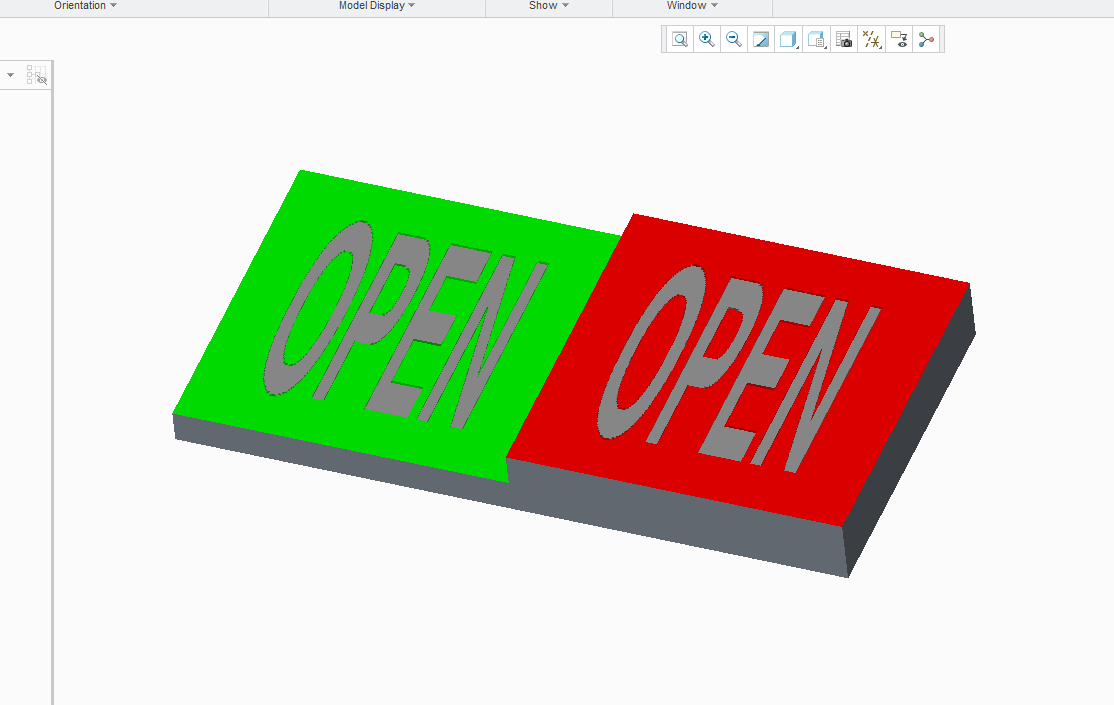
Thank you for your reply. Due to the nature of my work, I would prefer not to upload the decals I'm trying to use. However I have tried using the creo provided decals as you did, as well as simple images from google and all had the same problem. The models themselves are extremely simple at this point, just a square or circle extruded about 1mm. I tried the radio.txt file that you did and a screen grab is attached. I also tried it with the provided decal "open-wht.tx4". As this image is meant to be white writing on a black field, it gives a good example of my problem.
Jun 10, 2015
02:11 AM
- Mark as New
- Bookmark
- Subscribe
- Mute
- Subscribe to RSS Feed
- Permalink
- Notify Moderator
Jun 10, 2015
02:11 AM
More detailed images do a better job of showing decals. The included decals are very small and will pixelate. This is particularly problematic with poorly defined transparencies.
This image is a 1400x400 master bitmap file. The image editor in Creo is very old and has some hidden limitations. It likes multiples of 512 pixels for a master size.
I have had some very nice transparent images come from other programs where Creo was very respectful to the original.
This one is a transparent .png converted to .tx4. The .png was generated by DAZ studio.

Jun 10, 2015
03:31 AM
- Mark as New
- Bookmark
- Subscribe
- Mute
- Subscribe to RSS Feed
- Permalink
- Notify Moderator
Jun 10, 2015
03:31 AM
Oscar,
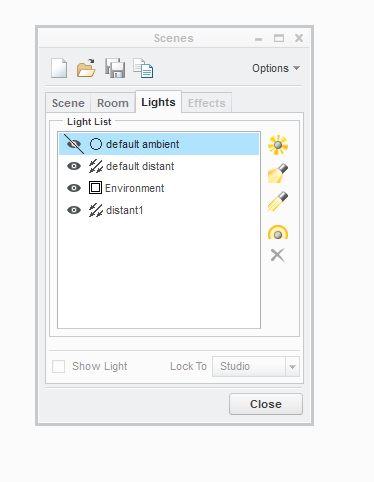
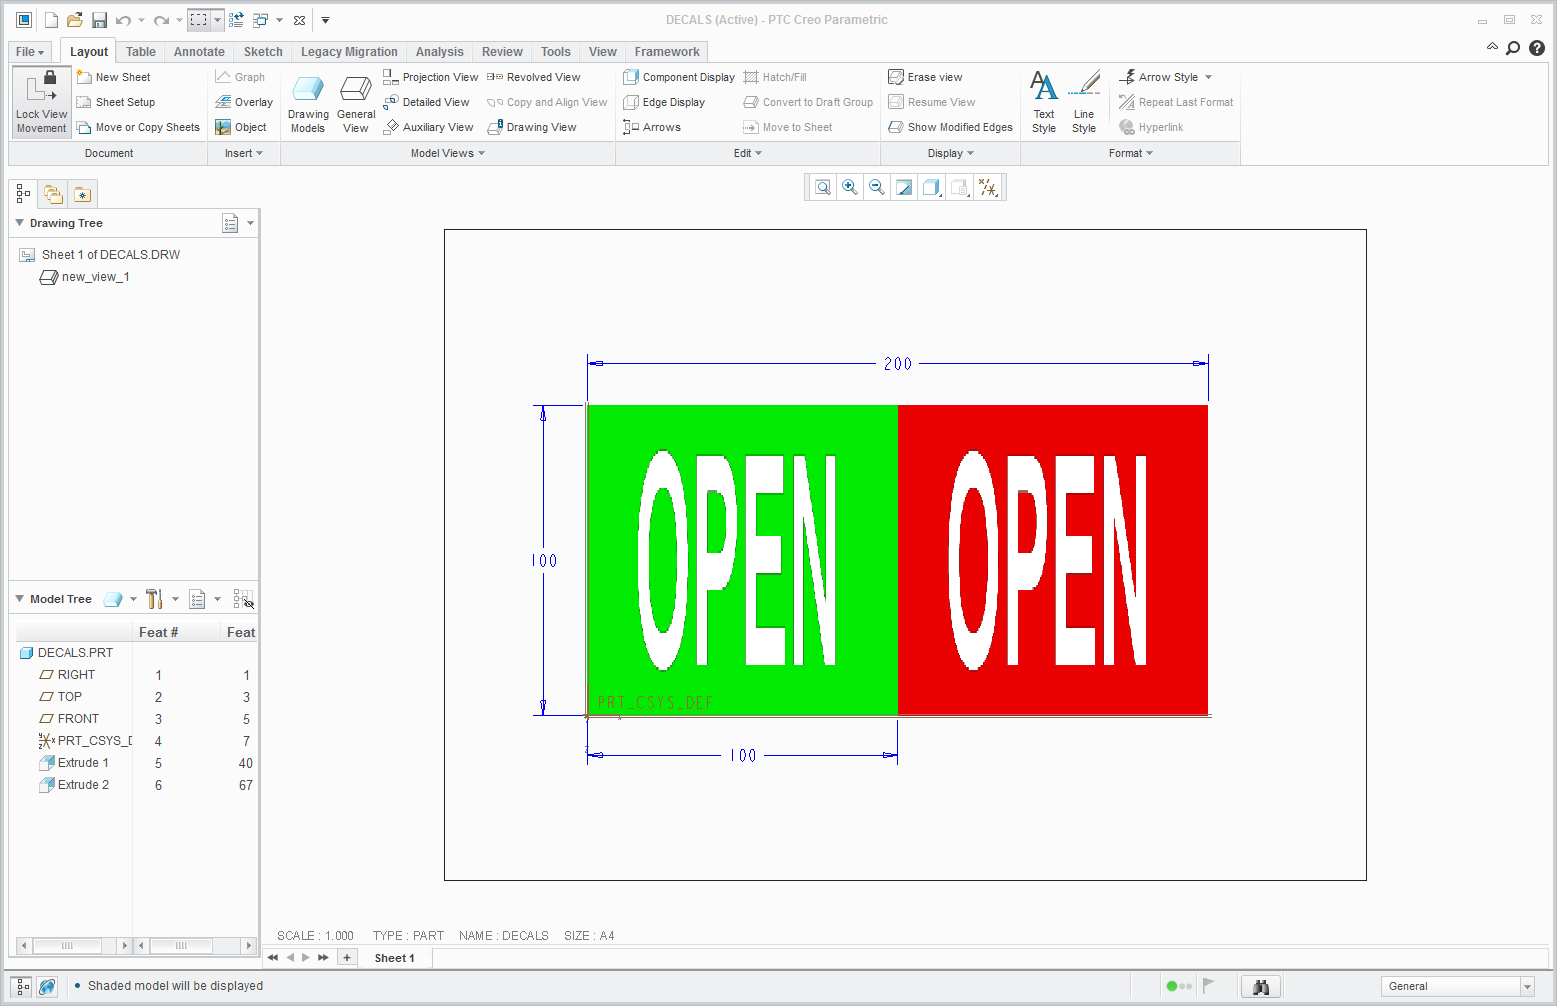
I tested Creo 3.0 M040, again. I used decal open-wht.tx4 (white text OPEN and transparent background). See following picture and open my part - everything looks fine with default Creo lights. I guess that Environment light is turned off in your Creo session.


Martin Hanak
Martin Hanák
Jun 10, 2015
06:23 PM
- Mark as New
- Bookmark
- Subscribe
- Mute
- Subscribe to RSS Feed
- Permalink
- Notify Moderator
Jun 10, 2015
06:23 PM
Hi Martin,
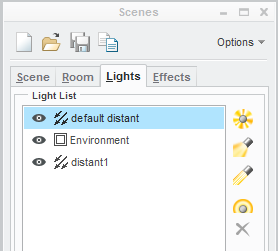
Thanks again for your reply. My light settings seem to be the same as yours
. \
\
I opened the decals.prt.1.zip you sent me. The part opens fine and the green and red colours of the part seem to be the same, however it opened without either of the "open" decals on it.
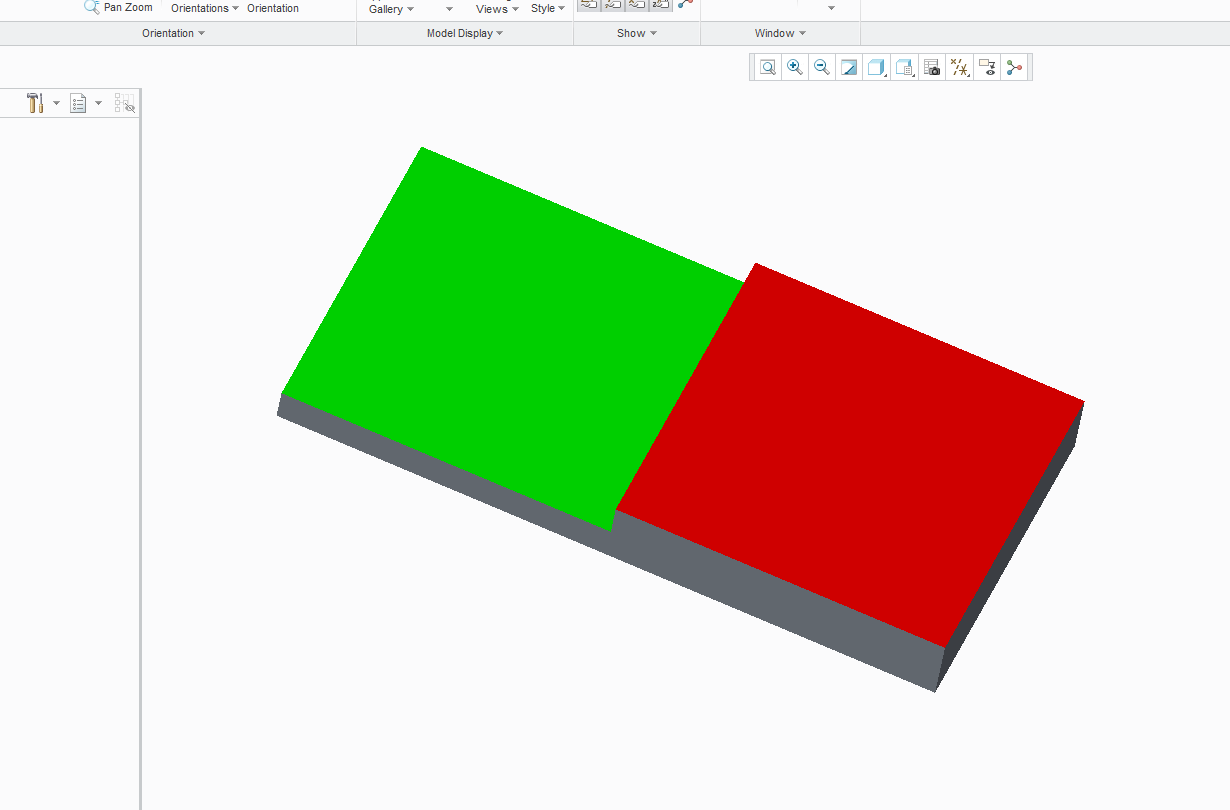
So I then added the decals myself and had the same problem again.
There must be a lighting or colour setting somewhere that needs to be fixed. Do you think it is something in the config.pro options as was the solution in the other thread? Windchill upgrade to Creo - decal issue (duller/greyish colors?) Note that the solution here did not solve my issue.
Jun 10, 2015
06:28 PM
- Mark as New
- Bookmark
- Subscribe
- Mute
- Subscribe to RSS Feed
- Permalink
- Notify Moderator
Jun 10, 2015
06:28 PM
Martin,
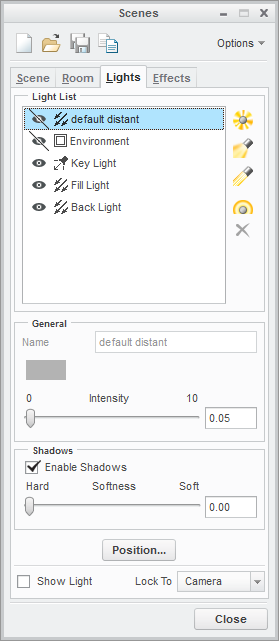
The intensity of my "default distant" light was initially 0, I have played with it a little and I was able to get the model to look like this.
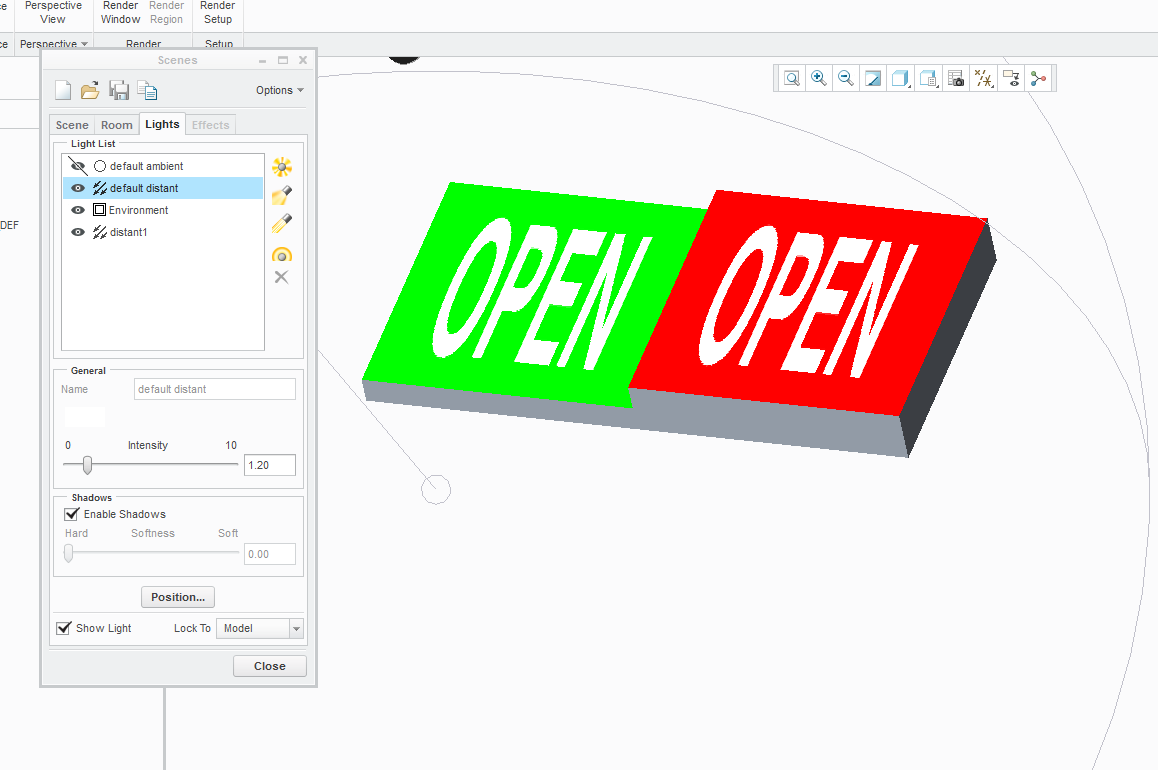
Could you please let me know what your settings are for each of those lights, especially intensity.
Thank you,
Oscar
Jun 10, 2015
07:31 PM
- Mark as New
- Bookmark
- Subscribe
- Mute
- Subscribe to RSS Feed
- Permalink
- Notify Moderator
Jun 10, 2015
07:31 PM
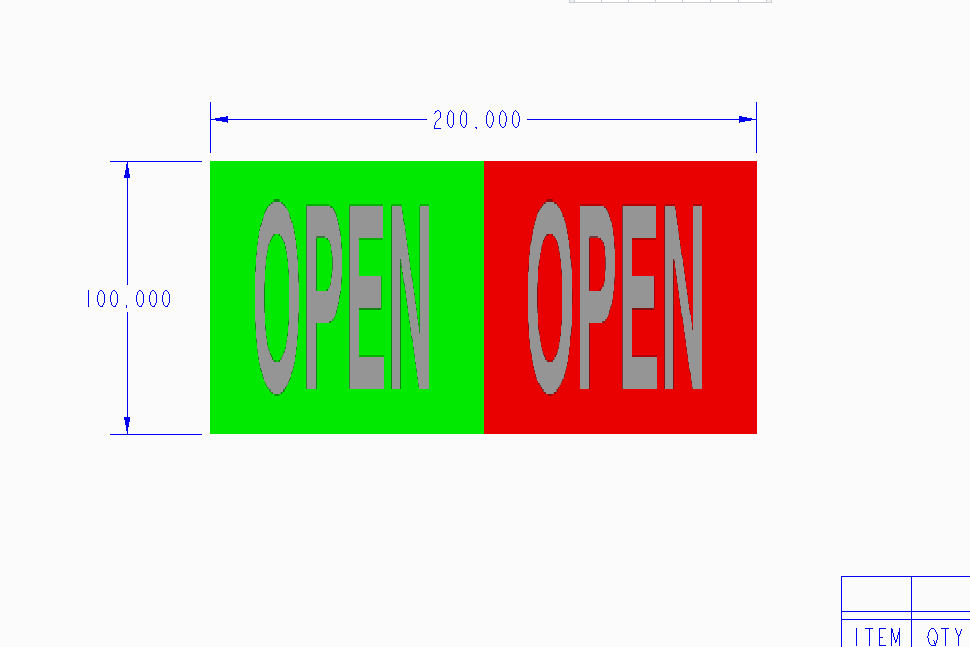
Ah, but then when I make a drawing, the problem returns. So it seems like changing the intensity doesn't solve the problem, just makes it seem better.
Jun 11, 2015
02:16 AM
- Mark as New
- Bookmark
- Subscribe
- Mute
- Subscribe to RSS Feed
- Permalink
- Notify Moderator
Jun 11, 2015
02:16 AM
Oscar,
I set config.pro option save_texture_with_model yes and saved part again. I also created a drawing. See attachments and pictures - decal has white color.
In Part mode I activated Render tab an clicked Scene button. Then I selected basic-3stripe-cylinder scene.
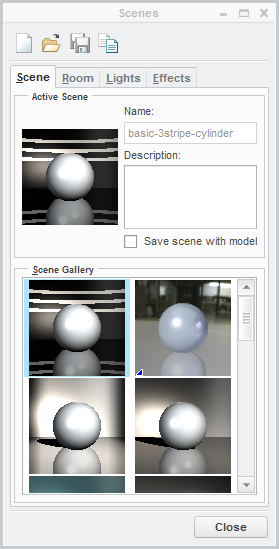
Light definitions are available on Lights tab.
Unfortunatelly the illumination in Drawing mode is not linked to the illumination in Part mode. In Drawing mode Creo applies hardcoded default illumination which cannot be modified. I do not understand why your drawing is grey and my drawing is white. Maybe graphics card affects the resulting display. Note: In my PC NVIDIA Quadro FX 570 card is installed.
Martin Hanak
Martin Hanák
Apr 13, 2018
08:56 AM
- Mark as New
- Bookmark
- Subscribe
- Mute
- Subscribe to RSS Feed
- Permalink
- Notify Moderator
Apr 13, 2018
08:56 AM
I'm having the same issue with Creo Parametric 4.0 / M030. After experimenting with part color / editing the applied decal properties...I submitted a case with PTC (14092112)...and I've learned that there is an issue with the decal mode that alters the colors. This is NOT a monitor / video card issue and it is not a case of being overly detail oriented...white should not change to grey (other colors are also affected...but white is very obvious). Changing the lighting intensity IS NOT a solution.
PTC...PLEASE fix this issue.
Jun 21, 2023
03:58 PM
- Mark as New
- Bookmark
- Subscribe
- Mute
- Subscribe to RSS Feed
- Permalink
- Notify Moderator
Jun 21, 2023
03:58 PM
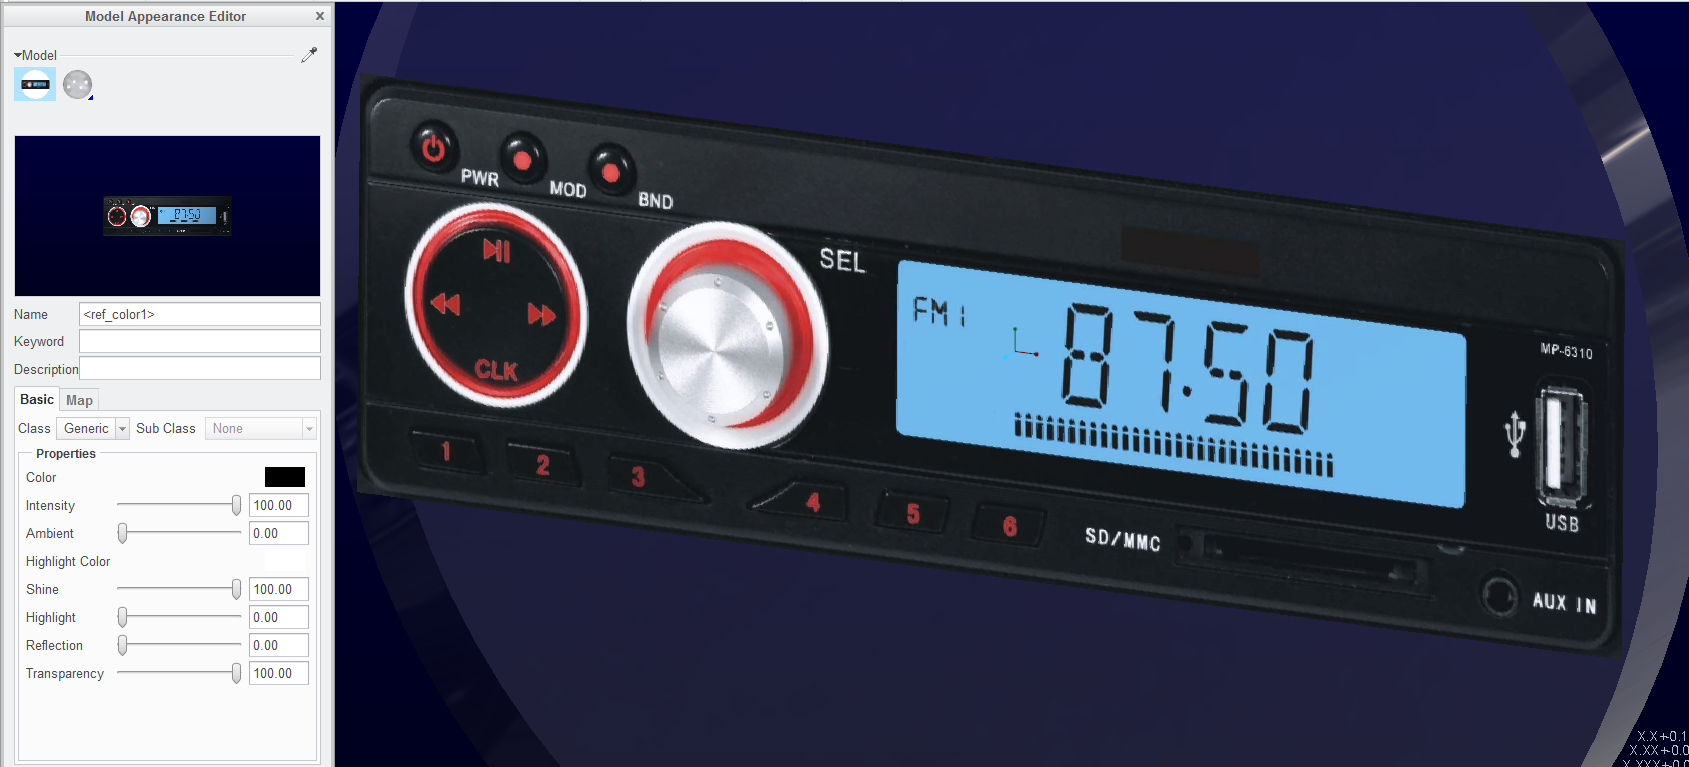
I had some success by inserting the graphic as a "Color Texture" as image. Then I was able to improve visibility some with the properties found in the "Basic" tab of the "Model Appearance Editor". The Iso view in drawing still was a little darker than I would like, but the front view is plenty visible and white appears to be white as expected. I did perform the light distance tweak mentioned above. Another simple task made incredibly difficult and with too many options. Only if my paycheck matched the complexity of this software. Hope this helps others with same question.
Announcements
Top Tags
